Food design guide
How to Make Custom Food in Tomodachi Life
Learn how to make custom food in Tomodachi Life, use food stamps, plan a readable design, and separate Nintendo-confirmed details from fan tips.
Updated October 3, 2026
To make custom food in Tomodachi Life: Living the Dream, treat the workshop as a tiny pixel-art canvas: start with one recognizable food shape, use an available food stamp when it helps, add only a few high-contrast details, and inspect the result at its normal item size. Nintendo’s Japanese guide confirms that foods you have already obtained can be used as stamps and that a finished creation can be given to a resident.
This is a focused design guide, not an all-food list or an official manual. Nintendo’s published article shows the item workshop and food examples, while the color, silhouette, and composition tips here are editorial suggestions. The public material does not establish a complete food count, a universal unlock level, a favorite-food formula, or a QR import method, so the page keeps those claims out.
Quick answer
Choose a food idea that reads from its outline, build it around one focal feature, and keep the palette simple. Use a stamp as a starting shape rather than forcing yourself to draw every detail by hand. Preview before finishing, then follow the prompts in your version of the game. You can give finished creations to residents, but the official article does not promise that a custom dish will become anyone’s favorite.
What the official food workshop guide confirms
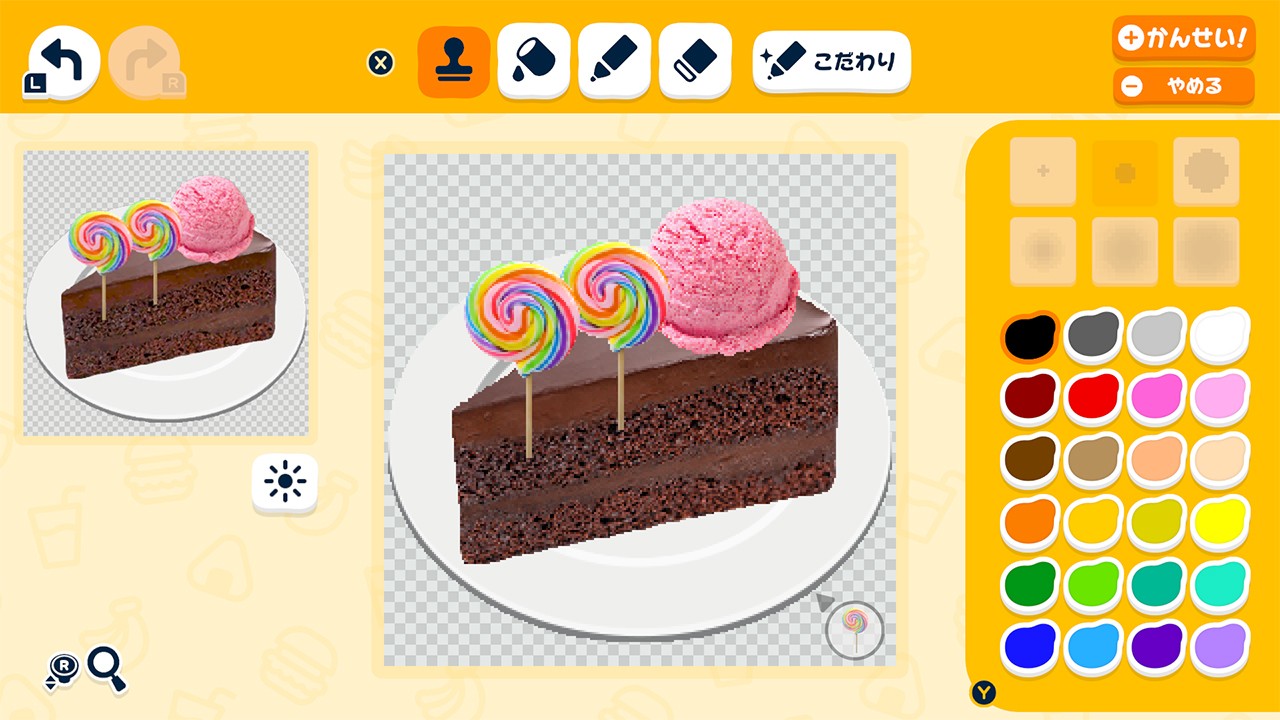
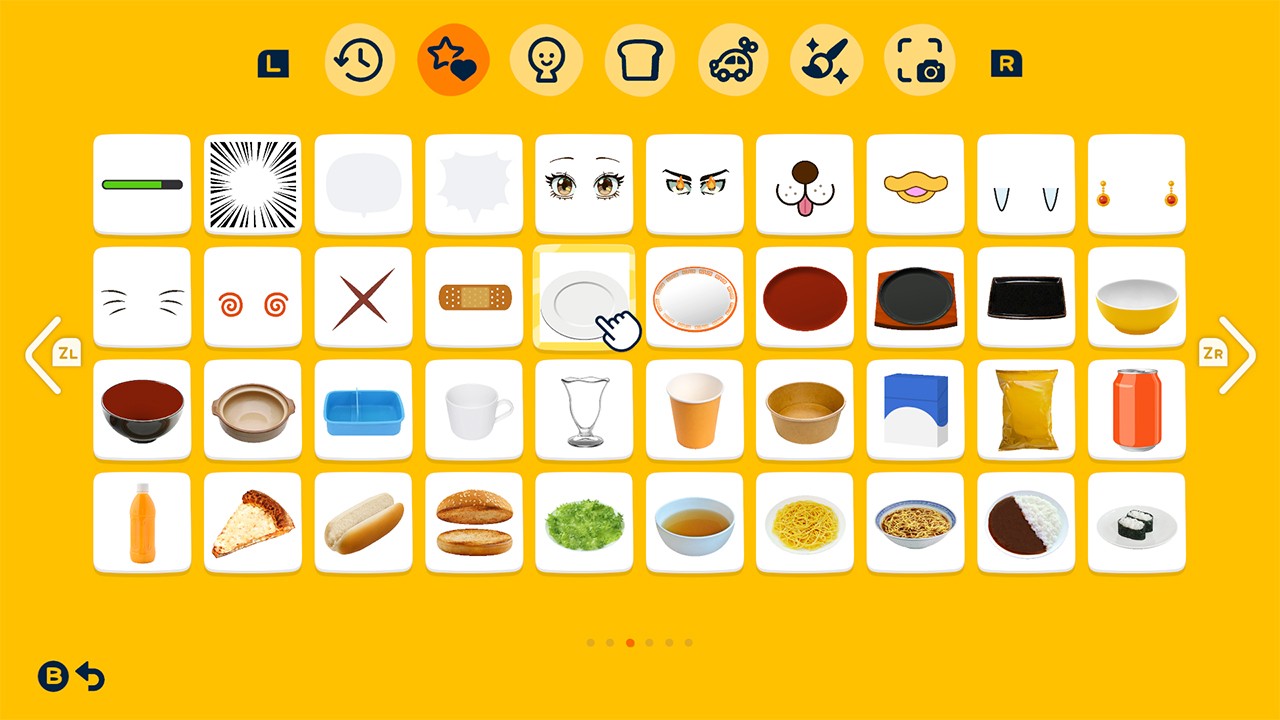
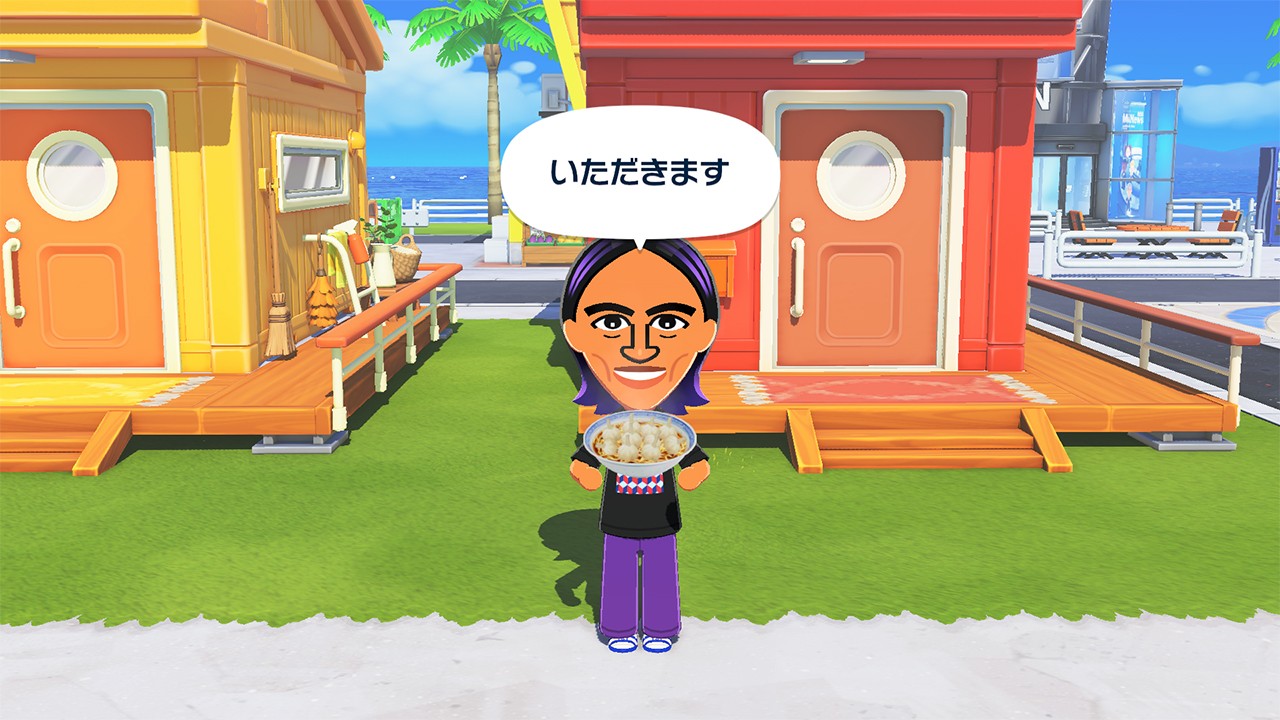
Nintendo’s Japanese item-making article describes an Item Workshop where players can make original items. In its food example, previously obtained foods can be selected as stamps and placed into a new design. The article also shows finished food being given to a resident. These are source-backed details; they establish that the workshop supports food creation and gifting, not every rule about how residents react.
The screens use Japanese labels, so English players should follow the names and prompts shown in their own software. The screenshot is useful for understanding the kind of canvas and stamp menu involved, but it is not a translated button-by-button guide. Keep the distinction clear: what is visible in Nintendo’s article is evidence; a particular order for choosing colors or composing a dish is a practical design method, not an official requirement.
How to make custom food in Tomodachi Life step by step
The safest workflow is visual rather than menu-specific. Nintendo documents the workshop and gives an example, but its public guide is not a complete control manual for every region. Use the sequence below to plan the artwork, then let your game’s on-screen instructions determine which item base, stamp, and finish action are available.
Before you start, decide whether the goal is recognition, a joke, or a gift that fits one Mii. A clear goal helps you reject small details that do not support the idea. If you are also planning the resident or the island around the design, connect it to the site’s Mii ideas or island ideas guide after the food itself works at small size.
1. Pick a shape before picking details
Name the food in one short phrase, such as a star cake, a sunrise bento, or a bowl of bright ramen. Then block in the largest silhouette first. A cake can be a rounded tier with a few toppings; a bento can be separated into two or three large color areas. This first pass is only a fan-made design exercise, not a claim that these exact items appear in a catalog. If a viewer cannot tell what the shape is when it is small, make the outline simpler before adding decoration.
2. Start from a stamp when it saves work
Nintendo’s article says foods already obtained can be used as stamps. That gives you a practical starting point when a familiar dish is easier to recognize than a blank canvas. Place one food shape, inspect its size, and add a small number of marks that change its meaning: a bright topping, a sauce stripe, or a few garnish pixels. Avoid stacking stamps until the silhouette is lost. The stamp is a drawing aid; it does not prove that the resulting design has a particular flavor, value, or resident reaction.
3. Limit the palette and assign each color a job
Use a base color, a shadow or outline color, and one accent before you reach for more. For a berry cake, a light base can carry a dark berry outline and a red accent. For a sunrise bento, separate a warm orange section from a green section with a clear border. This is editorial advice for small pixel art, not a restriction in the game. A limited palette makes the focal detail easier to spot and gives you fewer colors to revise if the first preview looks muddy.
4. Preview at the size residents will see
Do not judge the dish only while zoomed into the editor. Shrink your attention to the in-game presentation size and ask whether the main food is obvious in one glance. If the eye jumps among several marks, remove one detail. Check that the topping is not touching the edge, that a bowl or plate still has a visible boundary, and that the design has enough contrast against its background. Finish only when the preview feels balanced, using the controls your software presents.
Four custom food ideas to adapt
Use these prompts as drawing directions, not as official food names or collection entries. Each one relies on a large silhouette and a small number of recognizable accents. Swap the palette to match your own theme, or turn the same layout into a fictional snack. Keeping the table at the level of visual ideas avoids promising that a particular recipe, flavor, or bonus exists in the game.
A good test is to cover the label and see if the image still communicates the idea. If it does, the design is doing the work. If not, enlarge the distinctive feature or remove competing decoration. The prompts can also be adapted for residents with different personal themes without making claims about which foods they prefer.
| Visual concept | Simple base | Two or three details | Why it stays readable |
|---|---|---|---|
| Berry star cake | Rounded cake silhouette | One star, three berry dots | The star remains the single focal point |
| Sunrise bento | Rectangular divided box | Orange, green, and one pale section | Large color blocks survive at small scale |
| Midnight ramen | Dark bowl with a light rim | One noodle curve and two toppings | The bright rim separates bowl from background |
| Planet pudding | Small round dessert | One ring and one bright dot | A single orbit suggests a theme without tiny text |
Test the design and decide who to give it to
When a design is complete, check what the game presents and whether the food remains legible in context. Nintendo’s official article shows finished creations being given to residents, so gifting is a documented use case. The source does not say that each design triggers a fixed line, raises a particular statistic, or becomes a favorite, so treat any reaction you observe as a play experience rather than a universal rule.
If the first result looks crowded, make a simpler second draft instead of decorating the original further. Compare the two at the same display size. Keep the version with a clearer outline, a calmer background, and one identifiable topping. Record your own favorite designs if you want a personal gallery; do not treat a handful of island reactions as proof of a complete food-preference system.
Make food pixels clear instead of crowded
Small food art benefits from contrast and a strong contour. A dark outline around a pale plate can keep the shape distinct; a light topping on a dark bowl can preserve the focal point. Similar shades tend to merge when a design is shown small, so check both brightness and hue. The aim is not realism at full resolution. It is instant recognition in the game’s compact presentation.
Leave a quiet patch of canvas around the main object. That space separates a garnish from the plate and lets the viewer read the silhouette before noticing texture. If you are tempted to put a label or a sentence on the food, try a simple icon instead. The core meaning should come from the visible dish, not text that could shrink or become hard to read.
Use layers of attention
Give the design one primary feature, one supporting detail, and optional texture only if space remains. For a cake, the shape may be primary, the topping secondary, and sprinkles optional. For ramen, the bowl outline is primary and noodles are secondary. This hierarchy makes edits easier because you can identify which mark carries the idea. It also avoids a false sense of detail that disappears as soon as the artwork is seen beside other objects.
Keep edges and negative space intentional
A topping placed directly on the canvas edge can look cropped even if that is not what you intended. Leave a margin, align repeated dots, and use the plate or bowl rim as a visual boundary. Open space is useful, not wasted. If the dish looks uneven, compare the empty areas on both sides of the focal shape before adding another decoration. A few deliberate marks often look more finished than a fully filled canvas.
Separate drawing advice from game mechanics
The choices above are visual-design guidance. They do not tell you what food is unlocked, how many creations can be saved, or what a resident will say. Those facts need an official manual, support page, or clearly documented repeatable observation. Nintendo’s item-making page is the source for the stamp and gifting context on this page; check your own game prompts for the actions available in your region.
What this guide does not claim
This page is not a complete Tomodachi Life food list. Similar-looking item names across regions or older games should not be combined into an invented catalog. Nintendo’s public workshop story confirms that original food can be made and that owned food can be used as a stamp, but it does not publish a complete count, every unlock condition, or a region-by-region inventory in that article.
It also does not verify that a custom dish changes a resident’s favorite food, provides a hidden bonus, or can be imported with an old QR code. Those are separate questions from how to draw food. When a newer official manual or product update explains one of these mechanics, the answer should be updated with that source rather than inferred from a screenshot or a few player anecdotes.
Tomodachi Life custom food FAQ
How do I make custom food in Tomodachi Life?
Open the food-design option when it is available in your workshop and follow the prompts in your version. Plan a clear silhouette, use an available food stamp if it helps, add a few high-contrast details, and preview the design before finishing. Nintendo’s public Japanese guide confirms the workshop and stamp use, but it is not a complete English control manual.
Can a custom food design become a Mii’s favorite?
Nintendo’s cited article shows that a finished creation can be given to a resident, but it does not explain whether a custom dish becomes a favorite or how preferences are calculated. Do not treat the design itself as a guaranteed reaction.
Is this a complete list of Tomodachi Life foods?
No. This page covers how to plan an original food design. It does not claim to list every existing or regional food, and the cited public article does not provide a verified complete catalog.
Do I need to draw every part from scratch?
No. Nintendo’s Japanese article says previously obtained foods can be used as stamps. Use one as a starting shape when it helps, then add only the details needed to make your design distinct.
Does the guide list unlock levels or QR imports?
No. The official source used here does not document a universal unlock level or a QR import method for custom food, so this guide avoids carrying older-game instructions into the current title.
Official sources and image credit
Nintendo’s Japanese article is the source for the workshop, food stamps, and giving a finished creation to a resident. The screenshots are official Japanese-language game media used to illustrate those visible details. All layout, palette, and example prompts are editorial fan guidance, not Nintendo instructions.